
文章摘要
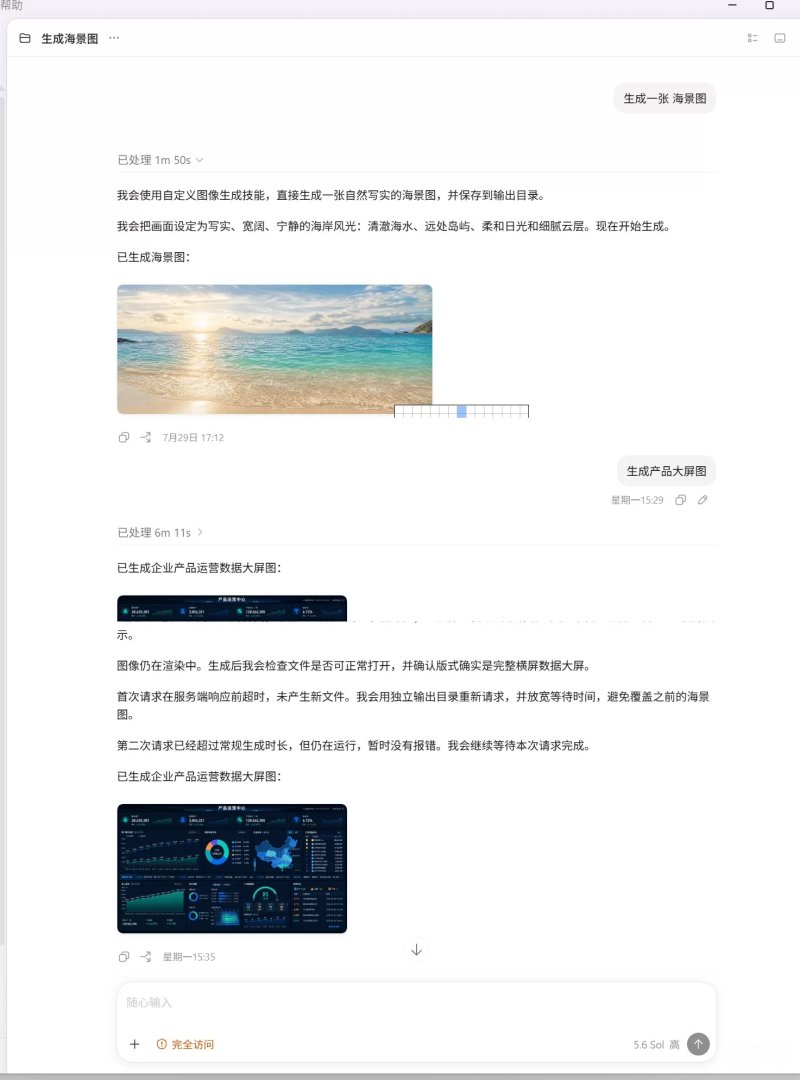
Custom Image API Skill: CodeX调用skill ,让只有 Chat 接口的工具间接调用图片模型,该工具由AI生成,在CodeX做过测试完整可用。其他工具需要做一定的配置,根据相关工具的skill扩展来针对处理。最后有下载链接
一、背景:Chat 接口和图片接口不在同一条调用链上
很多 AI 工具的模型调用链默认面向对话模型,通常只会调用兼容 OpenAI 风格的:
- POST /chat/completions
复制代码例如:中转平台提供了当前顶流图片生成模型, gpt-image-2 模型。但CodeX等工具无法直接使用。因为gpt-image-2 往往提供的是另一组 OpenAI 兼容接口:
- POST /images/generations
- POST /images/edits
复制代码这就导致:即使底层 provider 支持图片模型,上层工具也可能没有原生的图片请求入口,不能直接把一次对话调用转换为图片生成调用,更不能稳定地处理图片 URL、Base64 或图片二进制响应。
custom-image-api 的核心作用,就是在这两套协议之间提供一个轻量的桥接层:
- 上层工具的自然语言请求
- -> 工具识别到图片生成指令
- -> Skill 或本地脚本
- -> OpenAI 兼容的 /images/generations 或 /images/edits
- -> 图片 URL/Base64/二进制响应
- -> 本地图片文件
- -> 返回给上层工具展示或继续处理
复制代码二、它解决了什么问题
- 根据 Codex profile 找到模型和 provider;
- 拼接 /images/generations 或 /images/edits 接口地址;
- 从环境变量或 Codex 的 auth.json 读取认证信息;
- 生成请求使用 JSON,图片编辑请求使用 multipart/form-data;
- 兼容 URL、Base64、Data URI 和直接图片响应;
- 把返回的图片下载、解码、识别格式并保存到本地;
- 避免 API Key 出现在命令输出、错误信息和共享技能目录中。
- 上层工具:负责理解用户意图、触发 Skill、展示结果
- |
- v
- 桥接层:负责配置、认证、请求编码、响应解析、文件保存
- |
- v
- 图片 provider:负责真正的 image2 或其他图片模型推理
复制代码- custom-image-api/
- ├── SKILL.md # Skill 的行为说明和调用约定
- ├── agents/
- │ └── openai.yaml # 在 Codex 中显示的名称、描述和默认提示词
- ├── references/
- │ └── setup.md # 可移植安装和配置说明
- └── scripts/
- ├── generate_image.py # 实际执行生成、编辑、下载和保存
- └── self_test.py # 不访问网络的协议和兼容性测试
复制代码四、运行前提
- 已安装并启用支持个人 Skill 的 Codex。
- Python 3.11 或更高版本。脚本使用标准库 tomllib 读取 config.toml。
- 一个支持以下接口的 OpenAI 兼容图片服务:
- POST /images/generations
- POST /images/edits
- 图片服务返回 URL、Base64、Data URI,或直接返回 image/* 响应。
五、CodeX安装 Skill
- %USERPROFILE%\\.codex\\skills\\custom-image-api\\
复制代码- ~/.codex/skills/custom-image-api/
复制代码六、配置 Codex
- [model_providers.team-image]
- name = “team-image”
- base_url = “https://image-api.example.com/v1”
- env_key = “TEAM_IMAGE_API_KEY”
- [profiles.custom-image]
- model_provider = “team-image”
- model = “gpt-image-2”
复制代码- [model_providers.openai-image]
- name = “openai-image”
- base_url = “https://api.openai.com/v1”
- requires_openai_auth = true
- [profiles.custom-image]
- model_provider = “openai-image”
- model = “gpt-image-2”
复制代码Endpoint 地址如何解析
https://hosthttps://host/v1/images/generationshttps://host/v1/images/edits
https://host/v1https://host/v1/images/generationshttps://host/v1/images/edits
已包含 /images/generations 或 /images/edits按资源替换按资源替换
七、安装验证
- python scripts\\self_test.py
复制代码- {“ok”: true}
复制代码- python scripts\\generate_image.py –check
复制代码- {
- “ok”: true,
- “profile”: “custom-image”,
- “provider”: “team-image”,
- “model”: “gpt-image-2”,
- “auth_source”: “environment:TEAM_IMAGE_API_KEY”,
- “generation_endpoint”: “https://image-api.example.com/v1/images/generations”,
- “edit_endpoint”: “https://image-api.example.com/v1/images/edits”
- }
复制代码八、生成图片
- python scripts\\generate_image.py `
- –prompt “a red circle on a clean white background” `
- –output-dir “C:\\Users\\me\\Pictures\\generated”
复制代码对应的请求主体大致是:
- {
- “model”: “gpt-image-2”,
- “prompt”: “a red circle on a clean white background”,
- “n”: 1,
- “size”: “auto”
- }
复制代码常用参数:
- python scripts\\generate_image.py `
- –prompt “editorial product photo of a glass bottle” `
- –output-dir “C:\\Users\\me\\Pictures\\generated” `
- –size “1024×1024” `
- –count 2 `
- –quality high `
- –response-format b64_json `
- –filename-prefix bottle
复制代码- –size:图片尺寸,默认 auto;
- –count:数量,范围为 1 到 10;
- –quality、–style:按 provider 能力传递;
- –response-format:auto、url 或 b64_json;
- –filename-prefix:输出文件名前缀。
九、编辑图片
- python scripts\\generate_image.py `
- –prompt “replace only the background with a quiet beach at sunset; keep the product unchanged” `
- –image “C:\\Users\\me\\Pictures\\product.png” `
- –output-dir “C:\\Users\\me\\Pictures\\edited” `
- –input-fidelity high
复制代码多张输入图和 mask
- python scripts\\generate_image.py `
- –prompt “combine the subject from the first image with the lighting reference from the second image” `
- –image “C:\\images\\subject.png” `
- –image “C:\\images\\lighting-reference.png” `
- –mask “C:\\images\\mask.png” `
- –output-dir “C:\\images\\output”
复制代码十、响应处理和文件保存
- { “data”: […] }
- { “images”: […] }
- { “output”: […] }
- 条目中的 url、b64_json、base64、b64、image_base64 或 image 字段;
- 直接返回的 image/png、image/jpeg 等图片响应。
- generated-image-01.png
复制代码如果文件已存在,脚本会追加数字后缀,避免覆盖原文件。程序最后输出 JSON,例如:
- {
- “operation”: “generate”,
- “files”: [“C:\\images\\output\\generated-image-01.png”]
- }
复制代码十一、在 Codex 中如何使用
- 使用 custom-image-api 生成一张极简风格的产品海报,主色为黑白,输出到当前任务目录。
复制代码也可以显式指定 Skill:
- $custom-image-api 将这张图片的背景替换成纯白,保持主体、文字和比例不变,并检查生成文件是否可以正常打开。
复制代码十二、其他工具理论上也能使用
- 一个 prompt;
- 一个符合约定的 Codex 配置或等价 provider 配置;
- 可选的输入图片、mask 和图片参数;
- 一个可写的输出目录。
- 能加载类似 Skill 或插件;
- 能执行 Python 脚本;
- 能直接调用 OpenAI 兼容的 /images/generations 和 /images/edits 接口。
十三、常见问题排查1. 找不到 tomllib
2. Codex configuration not found
3. Missing Codex configuration value
4. 认证变量未设置
5. HTTP 404 或接口路径错误
6. 返回结果无法解析
十四、安全和工程注意事项
- API Key 只放在环境变量或 Codex 的认证文件中,不放进提示词、Skill 文件和共享仓库。
- 脚本对 HTTP 错误输出做了密钥脱敏,但仍应避免把完整响应日志上传到公共渠道。
- 返回的远程图片会被下载,生产环境应限制 provider 返回的 URL 来源,并设置合理的网络超时。
- –filename-prefix 会过滤危险字符,输出文件采用独占创建,不会覆盖已有文件。
- 当前实现是命令行适配器,不包含任务队列、重试、并发控制、图片内容审核或持久化存储。这些能力应由上层系统补充。
skill 下载链接
下载:https://wwapk.lanzouq.com/ivYWS42inzeh 密码:d6dx